In the oven RIGHT NOW are some yummy gluten-free rolls! I never thought I would be putting the words "yummy" and "gluten-free" in the same sentence - but I'm pretty sure I've only had bad gluten-free bread in the past. I'm a believer now! These rolls have sold me - and they are sooo easy to make.
Here is my version of a recipe I got from this gal I've been cooking for:
Makes 1 dozen rolls
1 1/2 c warm water (almost as warm as you can stand for about 20 seconds)
1 tsp whole cane sugar
2 1/4 tsp active dry yeast (one package)
3 Tbsp agave necter
3 Tbsp olive oil
1 Tbsp raw apple cider vinegar (any other plain vinegar works in a pinch)
1 c sorghum flour
1/2 c brown rice flour
1/2 c teff flour
1/2 c arrowroot flour
1/2 c tapioca flour
1 1/2 tsp xanthan gum
1 tsp sea salt
1/2 tsp baking soda
1/4 c chopped fresh garlic
2-3 Tbsp Italian seasoning or 1 Tbsp each basil and oregano
- Oil a 12-cup muffin tin. Find a warm place to proof the rolls (the oven set at about 200 works, as does a food dehydrator set at the same temp.)
- Stir the warm water, sugar and yeast together in a small bowl. Set aside while you mix together the dry ingredients.
- In a large bowl, combine all of the dry ingredients (leaving out the chopped garlic). Whisk together to completely combine.
- To the small bowl with the liquids - add the agave syrup, olive oil, and vinegar. Stir well to combine.
- Pour the wet ingredients over the dry ingredients and quickly whisk together. Continue to whisk to get rid of any lumps and keep whisking until the batter thickens and becomes smooth.
- Quickly add the chopped garlic and stir until just combined. (You want to work quickly after all the ingredients have been added together, otherwise you might loose the little air bubbles that are being created by the baking soda and the vinegar.)
- Spoon into the oiled muffin tin. Set in a warm place to rise for about 20 minutes.
- Bake in a preheated oven at 375 for 20-25 minutes (or until the tops are golden brown).
- Allow rolls to cool for a few minutes before removing from pan (a knife may need to be run around the edge of each roll to loosen.)
- Enjoy with butter, soup or salad or make each roll into a little mini sandwich!
Let me know what you think of these rolls! I just love them...
Showing posts with label baking. Show all posts
Showing posts with label baking. Show all posts
5.29.2011
4.15.2011
Meal #8 - Last one...
Meal number eight - Friday dinner
For dinner tonight I just thickened up last nights beef stew by throwing in a couple of handfuls of flour as I reheated it. Then I made some easy cheddar biscuits that I baked in a dutch oven on top of my beef "stew" - to create an instant... Beef Pot-Pie!

 For the biscuits just mix together:
2 c flour
1/2 tsp salt
1 tbsp sugar
4 tsp baking powder
Cut in:
1/3 c butter
1/2 c grated cheddar
Pour in:
1/3 c milk
Mix together until just blended.
I pretty much just tore pieces of dough off and flattened them into biscuit shapes that mostly fit together to cover the pot-pie. Then I baked the whole thing in the oven at 400 for about half an hour. Everyone loved this impromptu pot-pie!
This ends "the challenge". My dad is home now so he and Rosie will be taking care of feeding the kids tomorrow! Rosie has plans for breakfast that involve using up a bunch of frozen berries and some spinach...
Keep an eye out for my next "mini series" - Why Fat IS Good For You!
For dinner tonight I just thickened up last nights beef stew by throwing in a couple of handfuls of flour as I reheated it. Then I made some easy cheddar biscuits that I baked in a dutch oven on top of my beef "stew" - to create an instant... Beef Pot-Pie!


2 c flour
1/2 tsp salt
1 tbsp sugar
4 tsp baking powder
Cut in:
1/3 c butter
1/2 c grated cheddar
Pour in:
1/3 c milk
Mix together until just blended.
I pretty much just tore pieces of dough off and flattened them into biscuit shapes that mostly fit together to cover the pot-pie. Then I baked the whole thing in the oven at 400 for about half an hour. Everyone loved this impromptu pot-pie!
This ends "the challenge". My dad is home now so he and Rosie will be taking care of feeding the kids tomorrow! Rosie has plans for breakfast that involve using up a bunch of frozen berries and some spinach...
Keep an eye out for my next "mini series" - Why Fat IS Good For You!
Meal #7
Meal number seven - Friday Lunch
Success! This was easy and fabulously tasty... Chili Pie! My sister helped me make corn bread (she even found a good recipe in her Boxcar Children Cookbook by Diane Blain), and we topped a pie pan full of leftover chili with the corn bread batter.

 Here is the recipe she used...
1 1/4 c flour
3/4 c cornmeal
1/4 c. sugar
2 tsp baking powder
1/2 tsp salt
1 c milk
1/4 c vegetable oil
1 egg
Combine all ingredients in a large bowl, pour into a greased baking pan (or on top of some chili) and bake at 400 until a toothpick or a knife comes out clean.


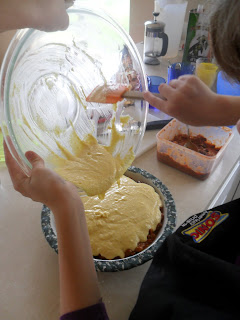 It did take a while longer then expected to bake (the chili was cold and I think that was a big factor), but the end result was worth the wait! We topped each bowl full with grated cheddar cheese and the whole thing magically disappeared, so fast in fact that I almost didn't get a picture of the end result.

Success! This was easy and fabulously tasty... Chili Pie! My sister helped me make corn bread (she even found a good recipe in her Boxcar Children Cookbook by Diane Blain), and we topped a pie pan full of leftover chili with the corn bread batter.


1 1/4 c flour
3/4 c cornmeal
1/4 c. sugar
2 tsp baking powder
1/2 tsp salt
1 c milk
1/4 c vegetable oil
1 egg
Combine all ingredients in a large bowl, pour into a greased baking pan (or on top of some chili) and bake at 400 until a toothpick or a knife comes out clean.


3.30.2011
Ayla's Gluten Free Cookies
My wonderful roommate Ayla invented these cookies last fall when she wanted a healthy alternative to the normal desserts that are packed full of refined, teeth-rotting sweeteners. Every couple of weeks she whips up a new batch for us to scarf down...
The recipe is as follows:
Preheat oven to 350 degrees
1/2 c. butter
2 Tbsp coconut oil (unrefined)
1 c. flax flour
1/2 c. tapioca flour
1 c. oats
1 c. shredded, unsweetened coconut
1/2 c. maple syrup or honey
1 tsp salt (preferable sea salt)
1 1/2 c. chocolate chips (the least healthy part of these cookies)
1 tsp vanilla
Mix all ingredients together until well incorporated. Drop by the spoonful (these don't spread very much) onto a lightly greased cookie sheet. Bake at 350 degrees for about 12 min. Let cool slightly and enjoy!
Ayla has also made these with many different combination's of gluten-free flours, as well as adding peanut butter or whole flax seeds. (The peanut butter version was a big hit!)
These cookies stay soft for at least a week. Not that I think they'll last you that long...
7.28.2010
Bread and Bakeries
I've had two interviews at the Great Harvest Bread Company! The first was your basic interview - with lots of questions and four people sitting there staring at you. The second was this morning - starting at 7:15 and it consisted of me just hanging out in the bakery... pretending like I was competent and knew how to knead bread dough :-) Apparently they can't decide between me and this other gal so they're trying us both out... how do I "beat" someone I know nothing about?! It was fun though...fun people, fun to get my hands back in some dough and flour :-)
Interesting experience too because the only real bakery experience was with the Moscow Food Co-Op - and even though there are plenty of similarities, there are also a few large differences. Mostly with the way the dough is shaped or kneaded. At the Coop we SHAPED our loaves... they really ended up looking like little bread loaves before they were even in the pan. We also folded most batches of dough part way through letting it rise... and we let the loaves proof or rise for a longer amount of time before actually going in the oven. The Coop was also trying to make "crusty artisan" type bread.
At Great Harvest the dough is pretty much kneaded into a smooth ball and then rolled into a log a little longer than the pan so that when it's put in the pan the middle is kind of "perky". As far as I can tell none of the doughs are folded. The rise and baking I'm not sure about yet - although they are much more careful about temperatures then the Coop... and they are making pretty much all soft loaves.
It's just interesting to see the differences. One thing that will be huge (and hopefully not to hard to get used to, if I get this job) is the pace that Great Harvest keeps. Many more doughs a day - and I thought we were pretty steady for the little while I was there but apparently they normally go MUCH faster with less people. Well - we'll see if a get a job offer... until then...
I am excited to try their Gluten-Free Bread sometime - job or no.
Speaking of bread... here is a wonderful Blue Cheese Spread that goes really fantastically with a lot of different breads!
Blue Cheese Spread
3 lb Cream Cheese - room temp
2 cups Walnut pieces - toasted
1 cup Sour Cream
1 Tbsp Black Pepper
1 bunch Green Onions - chopped
1.25 lb Blue Cheese Crumbles
1 bunch Parsley - chopped
Combine the first four ingredients and mix well. Add the last three ingredients and mix until incorporated. (I think the reason for this is so that those last three don't completely disintegrate). After it's all mixed - taste it and add a little more pepper or some salt if needed. Serve with bread or crostini or roast beef or whatever your taste buds tell you would taste good! Enjoy!
I love this spread so much because the blue cheese is really flavorful without being overwhelming. So yummy...
Subscribe to:
Posts (Atom)